Create and associate the Elastic IP with instance in AWS cloud
Elastic IP address are Public IP address. It remains static with the AWS Account. You can default have 5 max Elastic IP address with your account. You can assign the Elastic IP address with any of your EC2 Instance.
Note: Elastic IP remain with EC2 instance on system start or stop.
Following are the Steps to create and Associate with EC2 Instance
1. Check the Instance detail for setting the Elastic IP address.

2. You see that in above snapshot that Elastic IP address is empty for this instance.
Note: Empty Elastic IP address value means no Elastic IP is associated with EC2 instance.
3. Check you have any Elastic IP address in your account by check EC2 DASHBOARD
If it show 0 value then no Elastic IP address is present.

4. For Creating the Elastic IP address.
Go to the left side drag & drop window and Go to the Section Network & Security
Network & Security –> Elastic IPS –> Allocate New Address

5. Click on Allocate New Address

6. New Public IP address is allocated.

7. Now Associate that Elastic IP address with Instance.
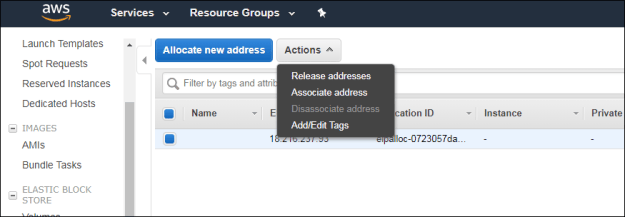
8. Associate the Private address and instance name with Elastic IP.
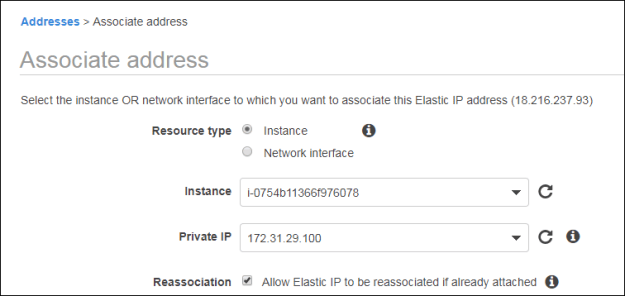
9. Associate address is completed successfully.

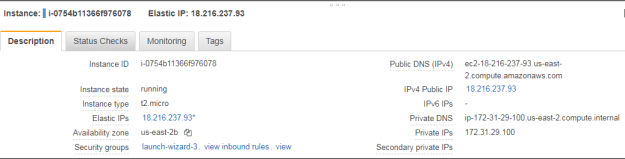
10. Check the Instance is assigned with Elastic IP address
Note: Public and Elastic IP address is same.
Pingback: Understand Public, Elastic and Private IP Address in AWS cloud | Smart way of Technology