Steps to apply the latest patching in the Standalone database in Oracle 19c
1. Take a full backup of the database with RMAN in another session
run {

allocate channel ch00 type disk;

backup AS COMPRESSED BACKUPSET format 'F:\patchbackup\rman\full_db_%t_%sp%p' filesperset 10 database;

release channel ch00;

allocate channel ch00 type disk;

backup format 'F:\patchbackup\rman\cntrl_%s_%p_%t' CURRENT CONTROLFILE;

backup format 'F:\patchbackup\rman\spfile_%s_%p_%t' spfile;

release channel ch00;

}
2. Open the other command prompt. Set the Oracle Home, OPATCH, and PATH environment variables
set oracle_home= e:\oracle\dbhome19

set path=%oracle_home%\bin;%oracle_home%\opatch;%path%

set oracle_sid=IC

SET PATH=%ORACLE_HOME%\perl\bin;%PATH%
3. Check the Oracle patch compatibilities.
Download the latest patch in the folder C:\patchfolder
Move to the command prompt C:\patchfolder
Unzip the patch

opatch prereq CheckConflictAgainstOHWithDetail -ph .
4. Check the lsinventory details for already applied patches.
opatch lsinventory 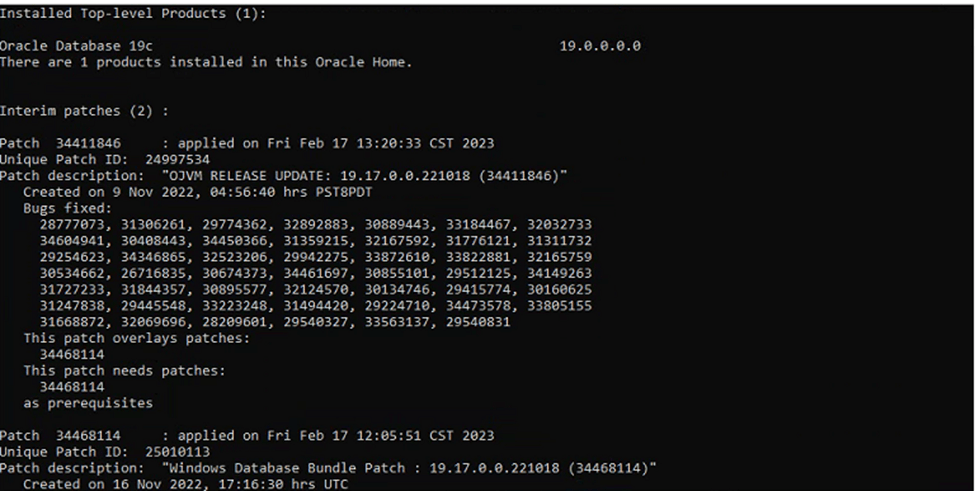
5. Check the OPatch utility version is the latest or otherwise check or read the patch readme to check the minimum version of OPatch needed to download.
Note: Replace the opatch folder in Oracle Home location if you want to update the opatch to latest version by simply copy paste.
opatch version
6. Check the invalid objects present before patching. If found try to compile by utlrp.sql
select count (*) from dba_objects where status='INVALID';7. Check the previous applied patch history
col action_time for a28

col action for a8

col version for a8

col status for a8

col comments for a30

set line 999 pages 999

select patch_id,status, Action, Action_time from dba_registry_sqlpatch order by action_time;
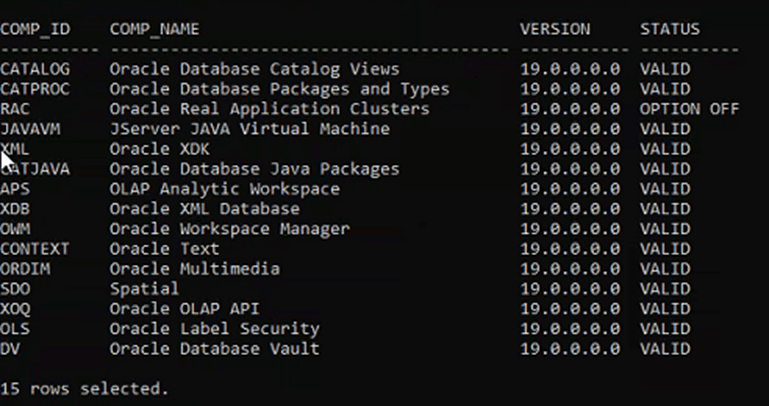
8. Verify that all database components are valid before starting patching
col comp_id for a10

col version for a11

col status for a10

col comp_name for a37

select comp_id,comp_name,version,status from dba_registry;

9. Shut down the Oracle Database if RMAN backup is completed.
shutdown immediate;10. Take the service down from services.msc
11. Backup the Oracle Home and Orainventory folder manually.
12. Roll back the patch if there is any conflict.
opatch rollback -id <conflict patch id>13. Go to the patch folder which needs to be applied.
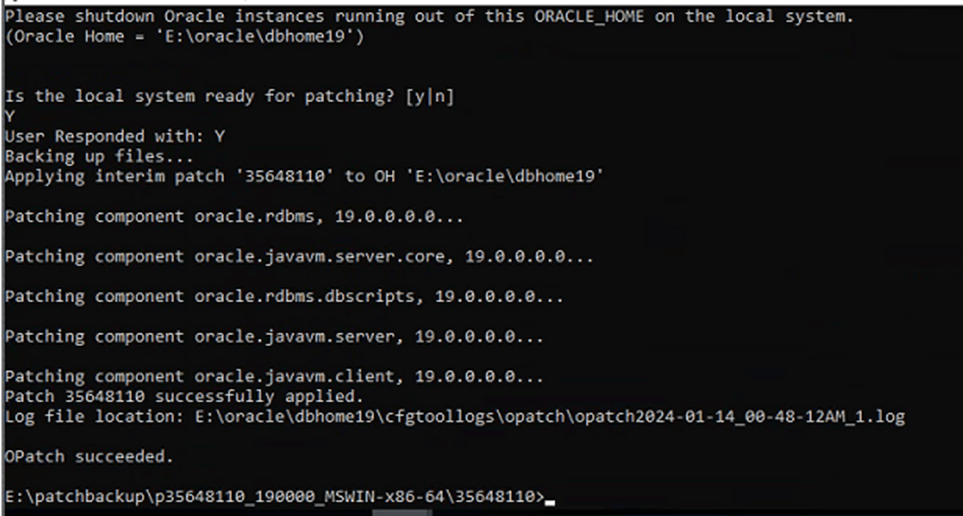
cd c:\downloadedpatch
Go to the folder where latest patch reside
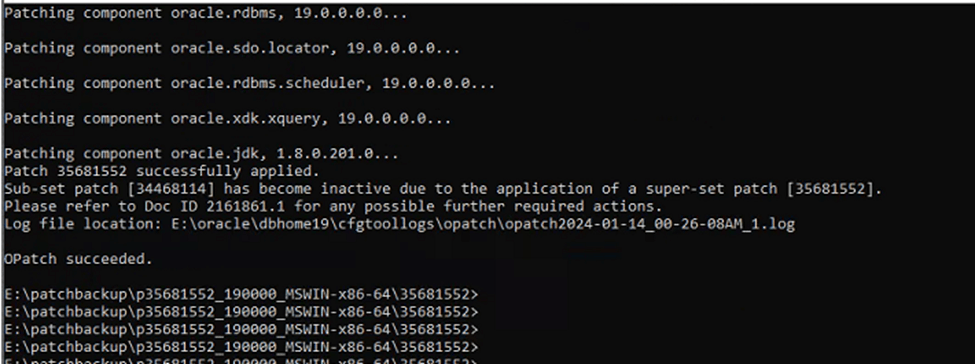
cd c:\downloadedpatch\patchid
c:\downloadedpatch\patchid> Opatch apply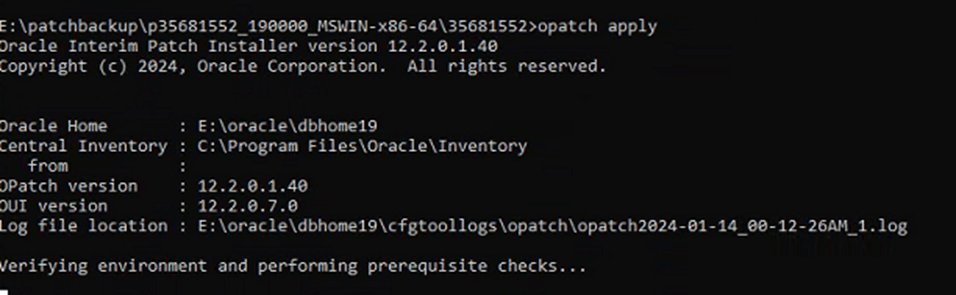
14. Apply OJVM patch if available
Go to the folder where latest patch reside
cd c:\downloadedpatch\ojvmpatchid
c:\downloadedpatch\patchid> Opatch apply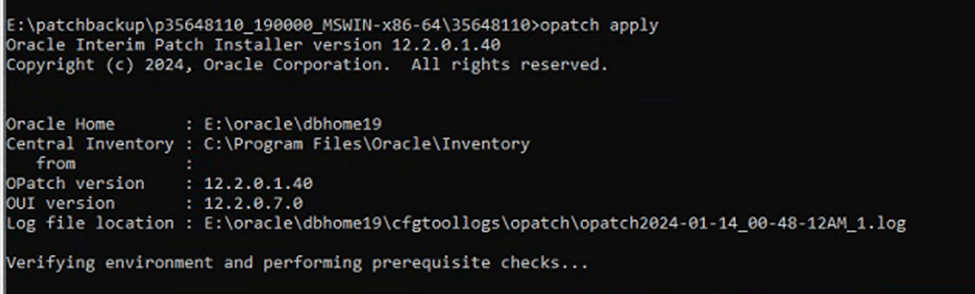
15. Start the Oracle service from services.msc
Startup the database
Startup
16. Go to the directory opatch
cd %ORACLE_HOME%/OPatch

datapatch -verbose
17. Start all the services from services.msc related to Oracle.
18. Revalidate the invalid objects after patching
sqlplus /nolog

SQL> CONNECT / AS SYSDBA

SQL> @?\rdbms\admin\utlrp.sql

select count (*) from dba_objects where status='INVALID';

19. Check the database component all should be in a valid state. If invalid raise the SR with Oracle.
Set line 200 pages 200

col comp_id for a10

col version for a11

col status for a10

col comp_name for a40

select comp_id,comp_name,version,status from dba_registry;
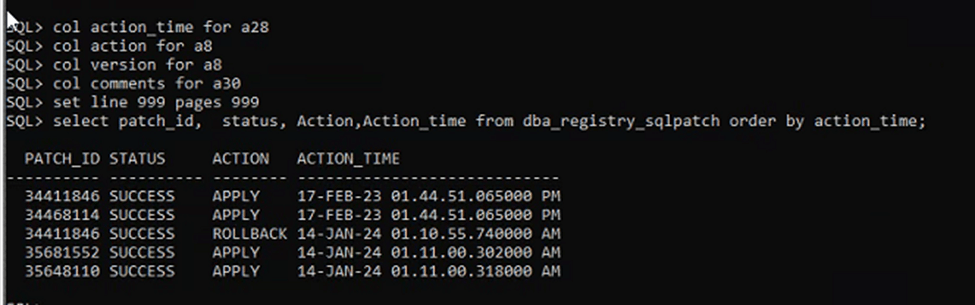
20. Check the applied patch status from the database.
col action_time for a28

col action for a8

col version for a8

col comments for a30

set line 999 pages 999

select patch_id,  status, Action,Action_time from dba_registry_sqlpatch order by action_time;
21. Verify the database is started and its in read-only mode.
Col database_name for a13

Col open_mode for a10

Select database_name,open_mode, status from v$database , v$instance;
212. Check the listener is working.
lsnrctl status

-- Verify the lisntern connectivity by login
sqlplus sys@tnsentry as sysdba