Steps to install Oracle 19c on Linux Environment
First Install Linux on Virtual Machine for install Oracle.
Lets login with root user and start the installation process
You can also edit /etc/hostname file in linux to give name:
vi /etc/hostname

127.0.0.1   localhost localhost.localdomain localhost4 localhost4.localdomain4
192.168.90.101 oraclemachine.localdomain oraclemachine- Lets start with the first command to update yum
yum update -y2. Open the file and update the following entries in the file and save it.
vi /etc/sysctl.conf


fs.file-max = 6815744
kernel.sem = 250 32000 100 128
kernel.shmmni = 4096
kernel.shmall = 1073741824
kernel.shmmax = 4398046511104
kernel.panic_on_oops = 1
net.core.rmem_default = 262144
net.core.rmem_max = 4194304
net.core.wmem_default = 262144
net.core.wmem_max = 1048576
net.ipv4.conf.all.rp_filter = 2
net.ipv4.conf.default.rp_filter = 2
fs.aio-max-nr = 1048576
net.ipv4.ip_local_port_range = 9000 65500
3. Run the following command to change the current kernel parameters:
/sbin/sysctl -p4. Run the following command and add the values in configuration file:
vi /etc/security/limits.d/oracle-database-preinstall-19c.conf

oracle   soft   nofile    1024
oracle   hard   nofile    65536
oracle   soft   nproc    16384
oracle   hard   nproc    16384
oracle   soft   stack    10240
oracle   hard   stack    32768
oracle   hard   memlock    134217728
oracle   soft   memlock    134217728
5. Create new group and users.
--- Add group in linux
groupadd -g 54321 oinstall
groupadd -g 54322 dba
groupadd -g 54323 oper

useradd -u 54321 -g oinstall -G dba,oper oracle

--set the password
passwd oracle
6. Change the value to permissive in file /etc/selinux/config
vi /etc/selinux/config

SELINUX=permissive
7. Restart the server after executed the commands:
setenforce Permissive8. Disable the firewal if needed
# systemctl stop firewalld
# systemctl disable firewalld
9. Make the Oracle directories
mkdir -p /u01/app/oracle/product/19.0.0/dbhome_1
mkdir -p /u02/oradata
chown -R oracle:oinstall /u01 /u02
chmod -R 775 /u01 /u02
10. Edit the bash profile
vi /home/oracle/.bash_profile

export TMP=/tmp
export TMPDIR=$TMP

export ORACLE_HOSTNAME=ol8-19.localdomain
export ORACLE_UNQNAME=cdb1
export ORACLE_BASE=/u01/app/oracle
export ORACLE_HOME=$ORACLE_BASE/product/19.0.0/dbhome_1
export ORA_INVENTORY=/u01/app/oraInventory
export ORACLE_SID=cdb1
export PDB_NAME=pdb1
export DATA_DIR=/u02/oradata

export PATH=/usr/sbin:/usr/local/bin:$PATH
export PATH=$ORACLE_HOME/bin:$PATH

export LD_LIBRARY_PATH=$ORACLE_HOME/lib:/lib:/usr/lib
export CLASSPATH=$ORACLE_HOME/jlib:$ORACLE_HOME/rdbms/jlib
11. copy the software at $ORACLE_HOME location
12. Unzip the Oracle Software and run ./runInstaller
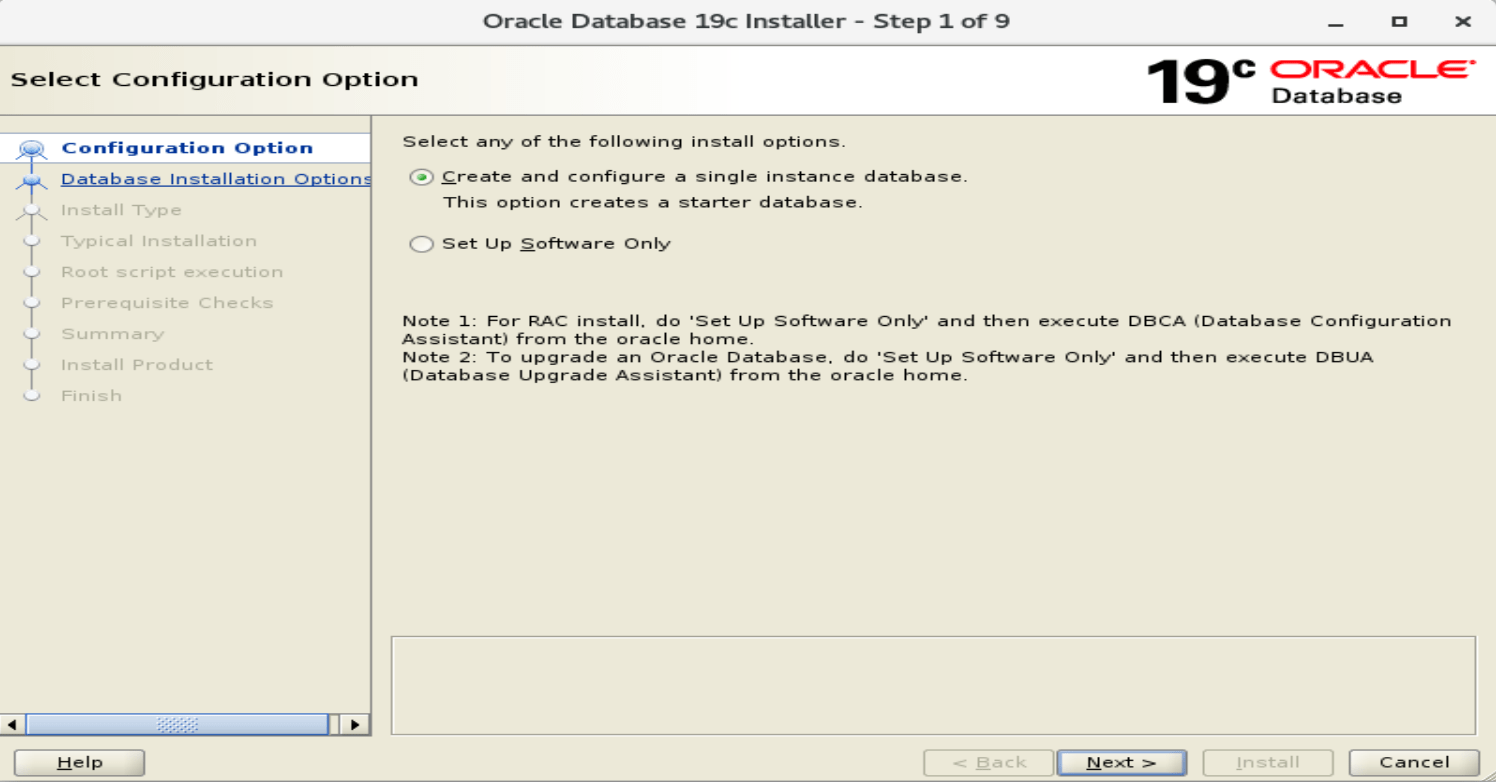
13. The following GUI window will start which ask for select any of the following install options 1. Create and configure a single instance database 2. Set up software only.
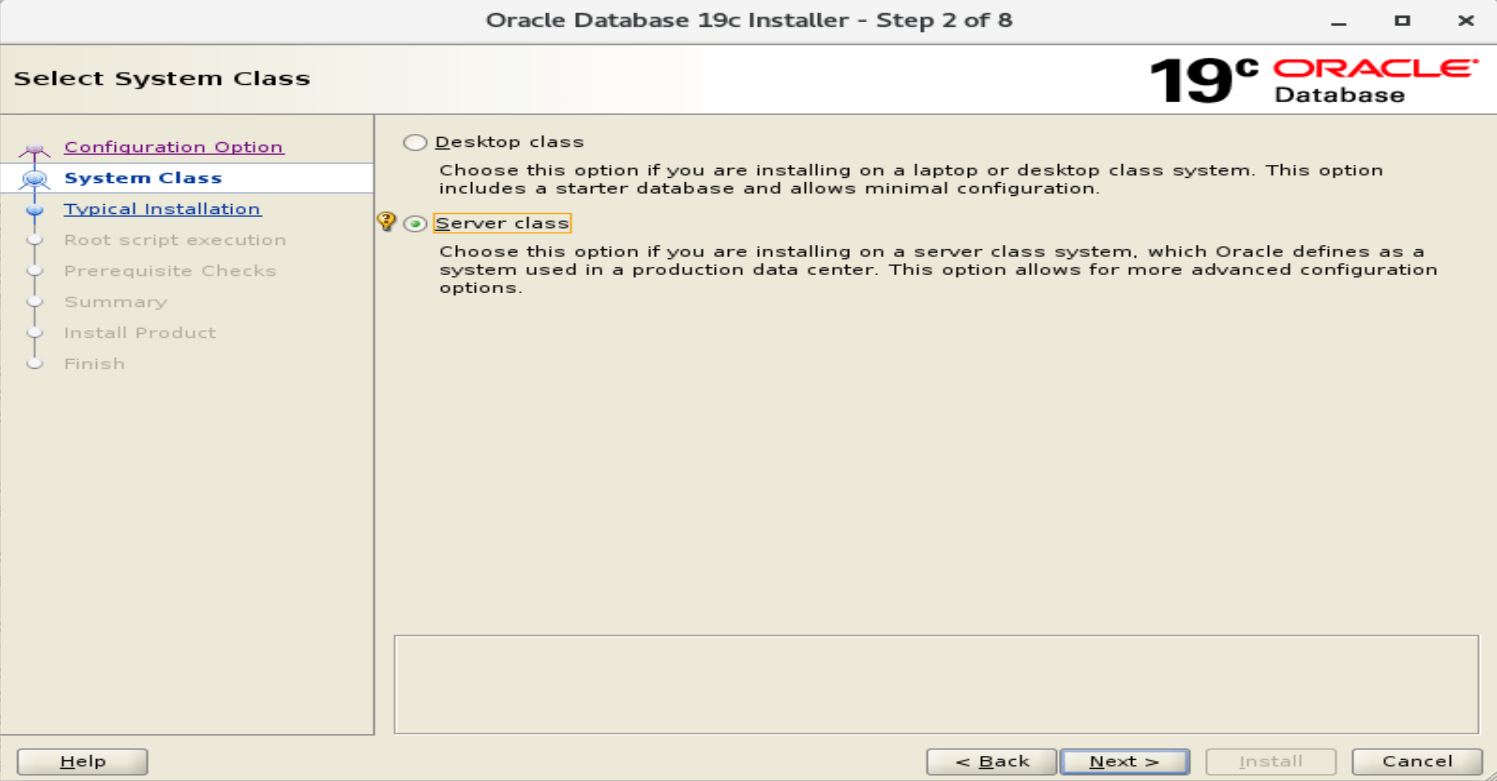
14. Select System Class : Desktop Class and Server Class
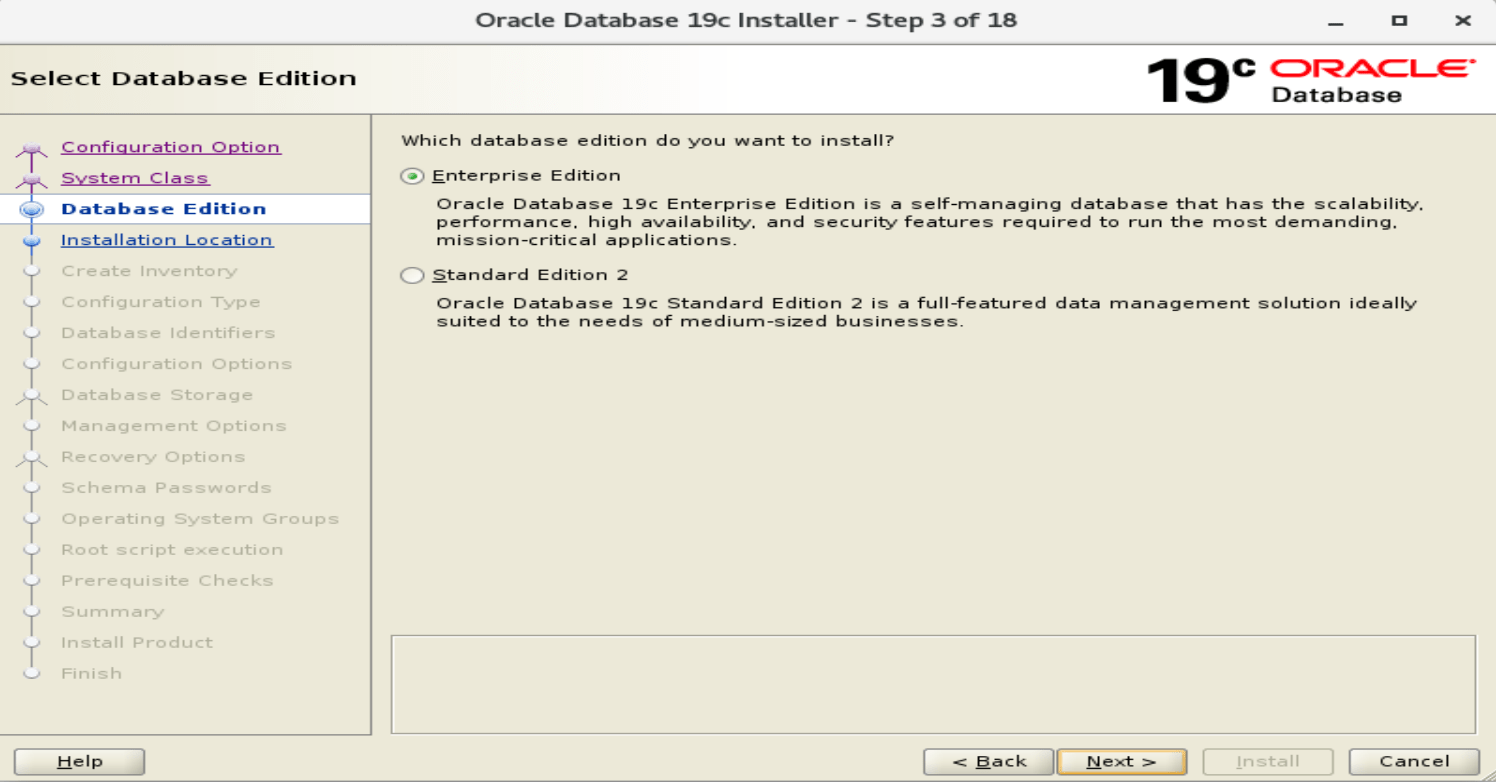
15. Which database edition do you want to install.
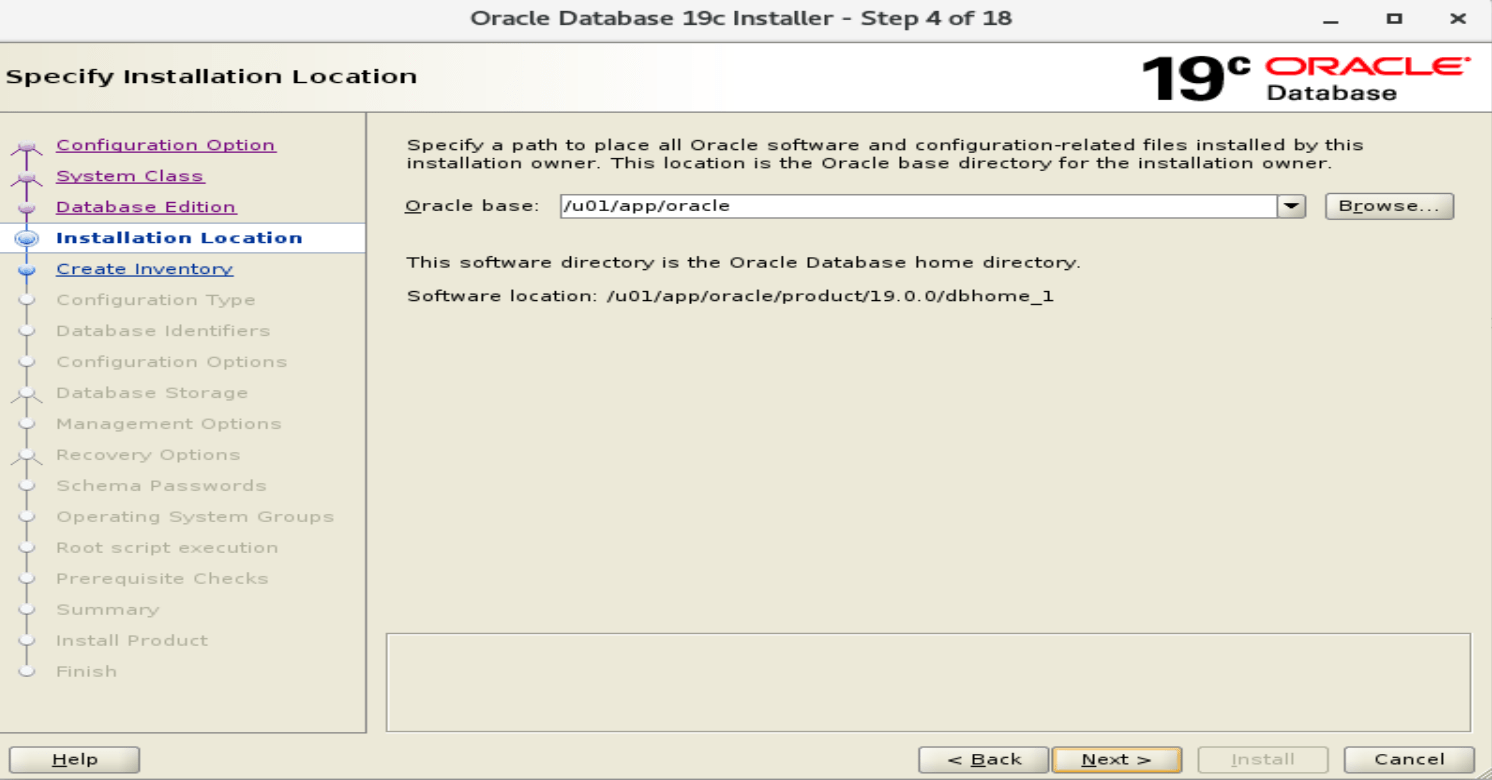
16. Specify a path to place all oracle software and configuration related files installed by this installation owner.
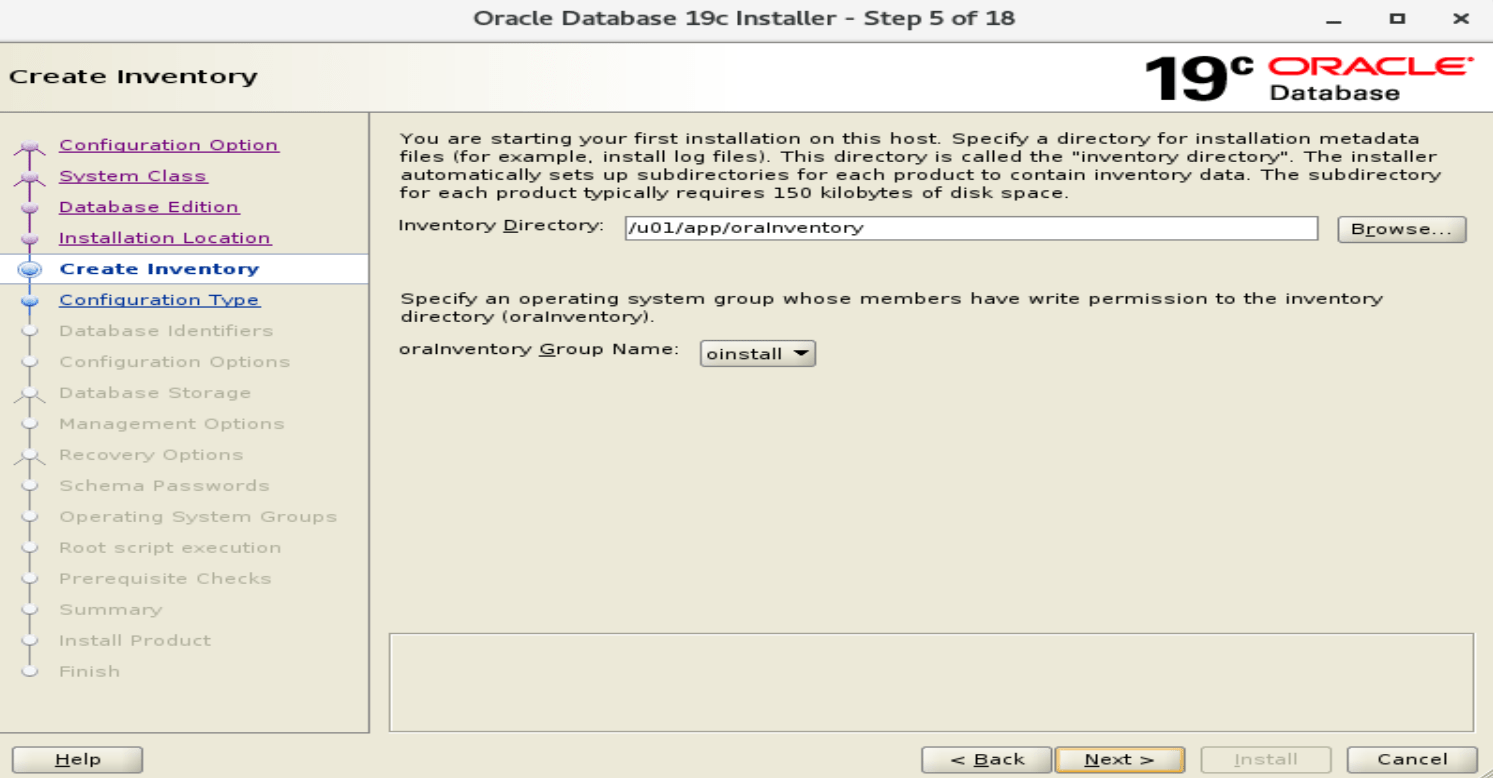
17. Choose the location for oracle Inventory.
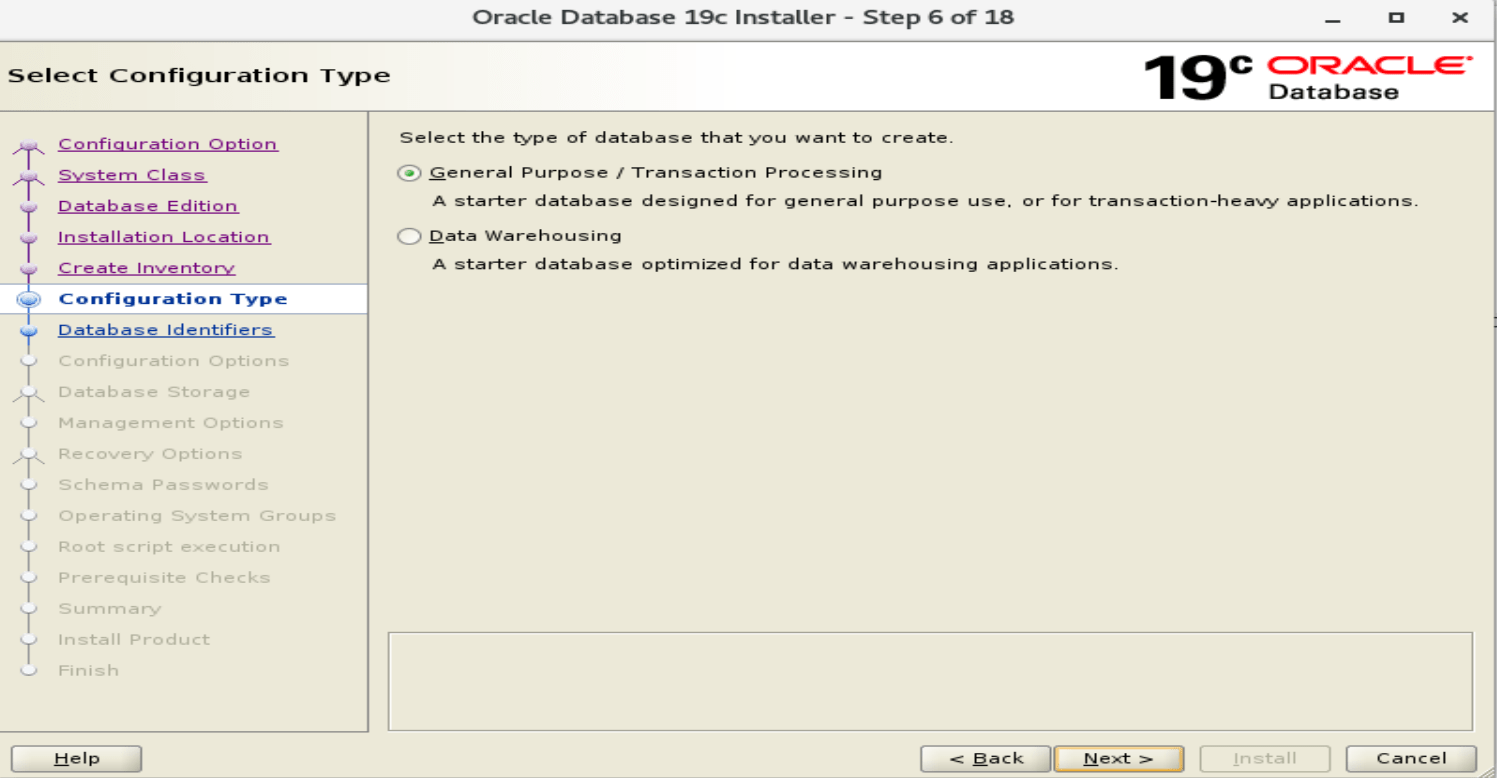
18. Select the type of database that you want to create. General Purpose/ Transaction processing or Data Warehousing
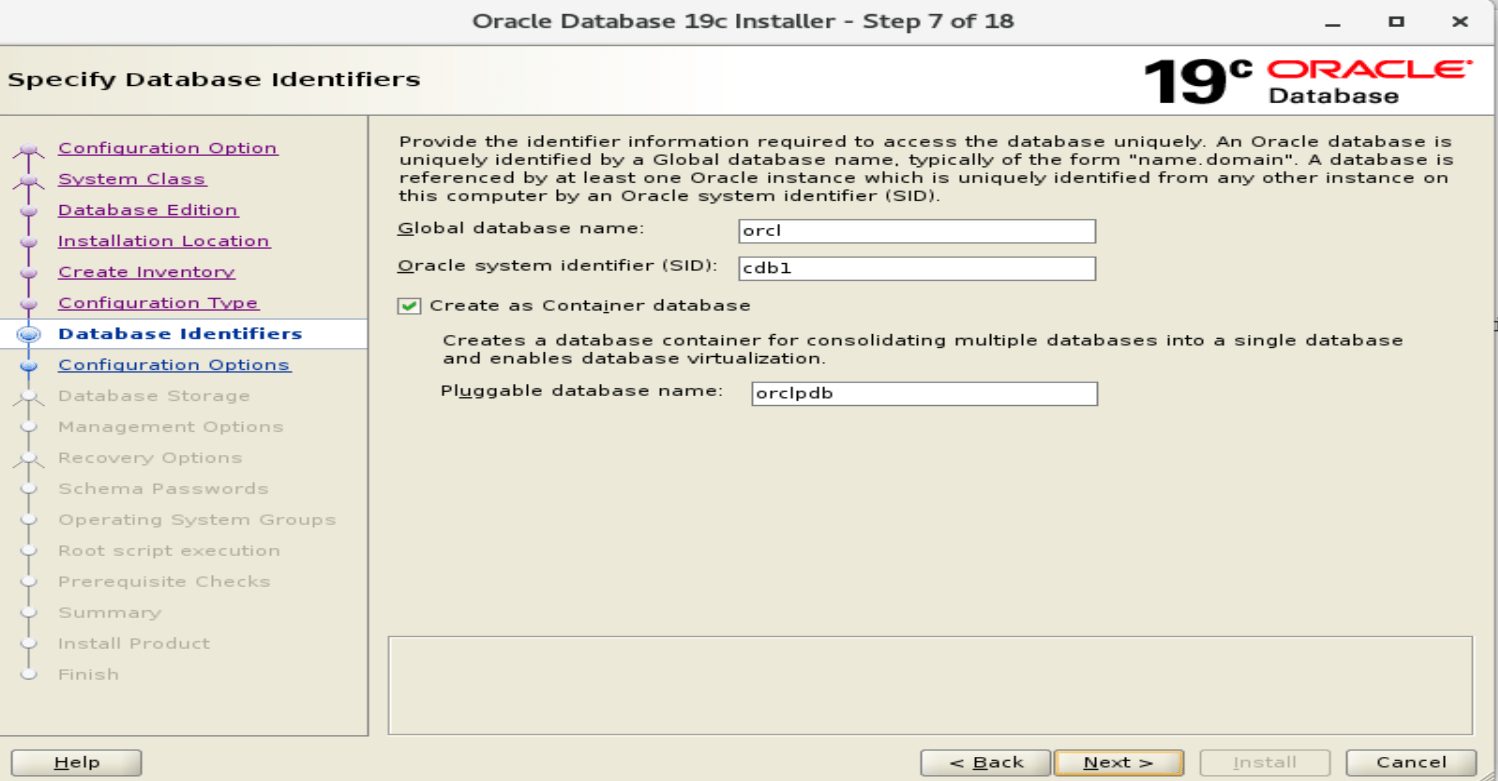
19. Specify database identifiers
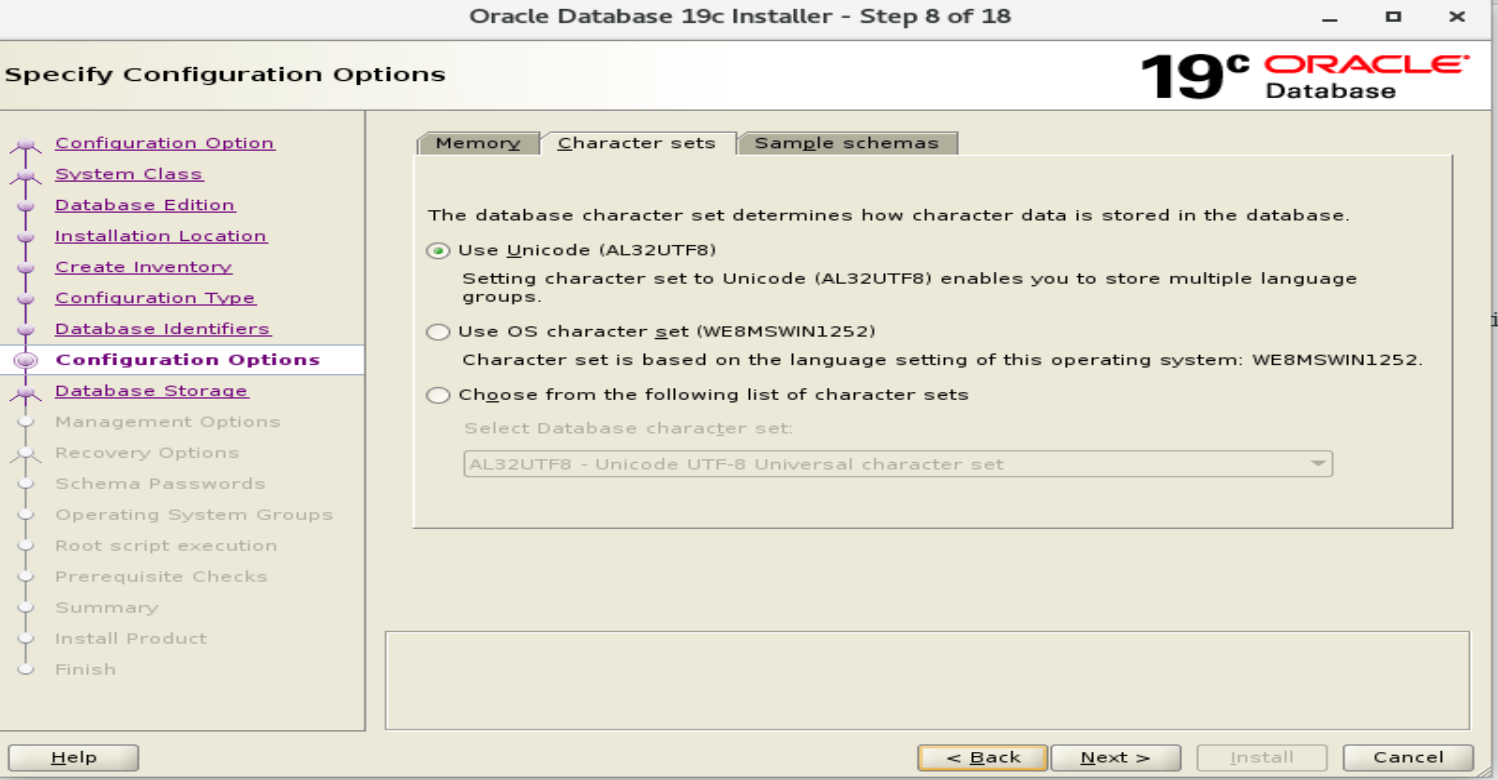
20. Choose the memory session or enable automatic memory management parameter for SGA.
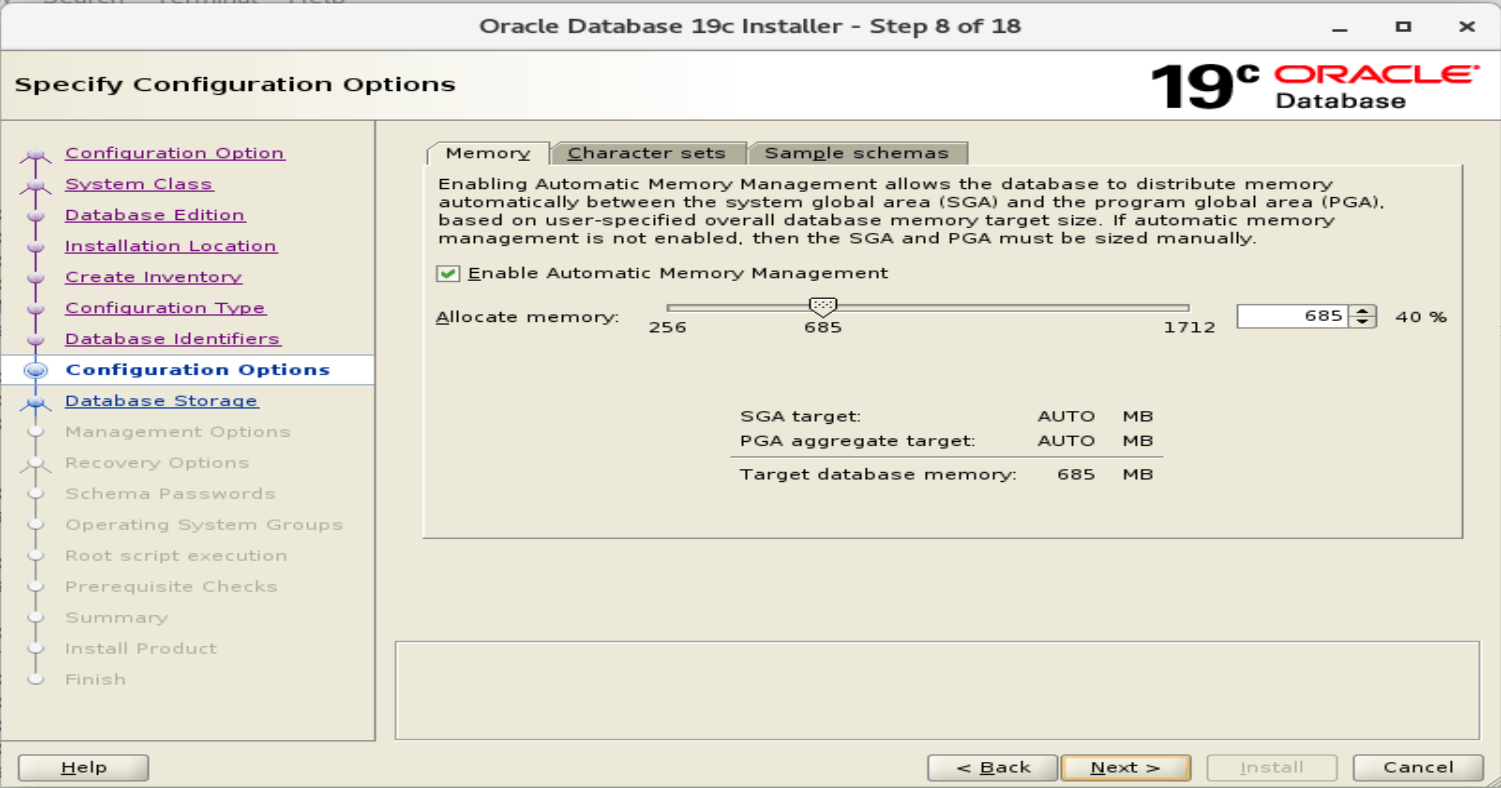
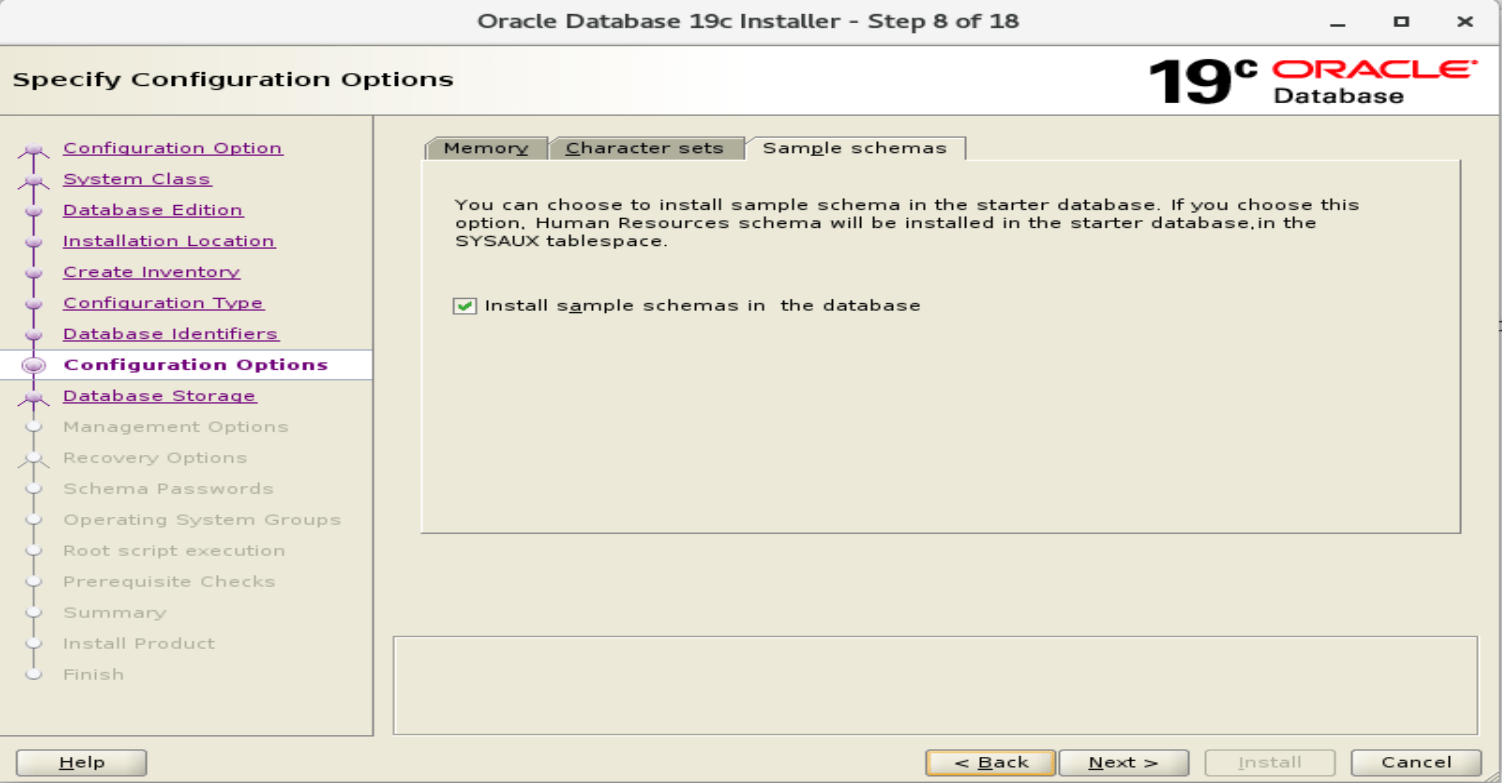
21. From the same screen, you can change the character sets for the database by choosing charater sets tab.
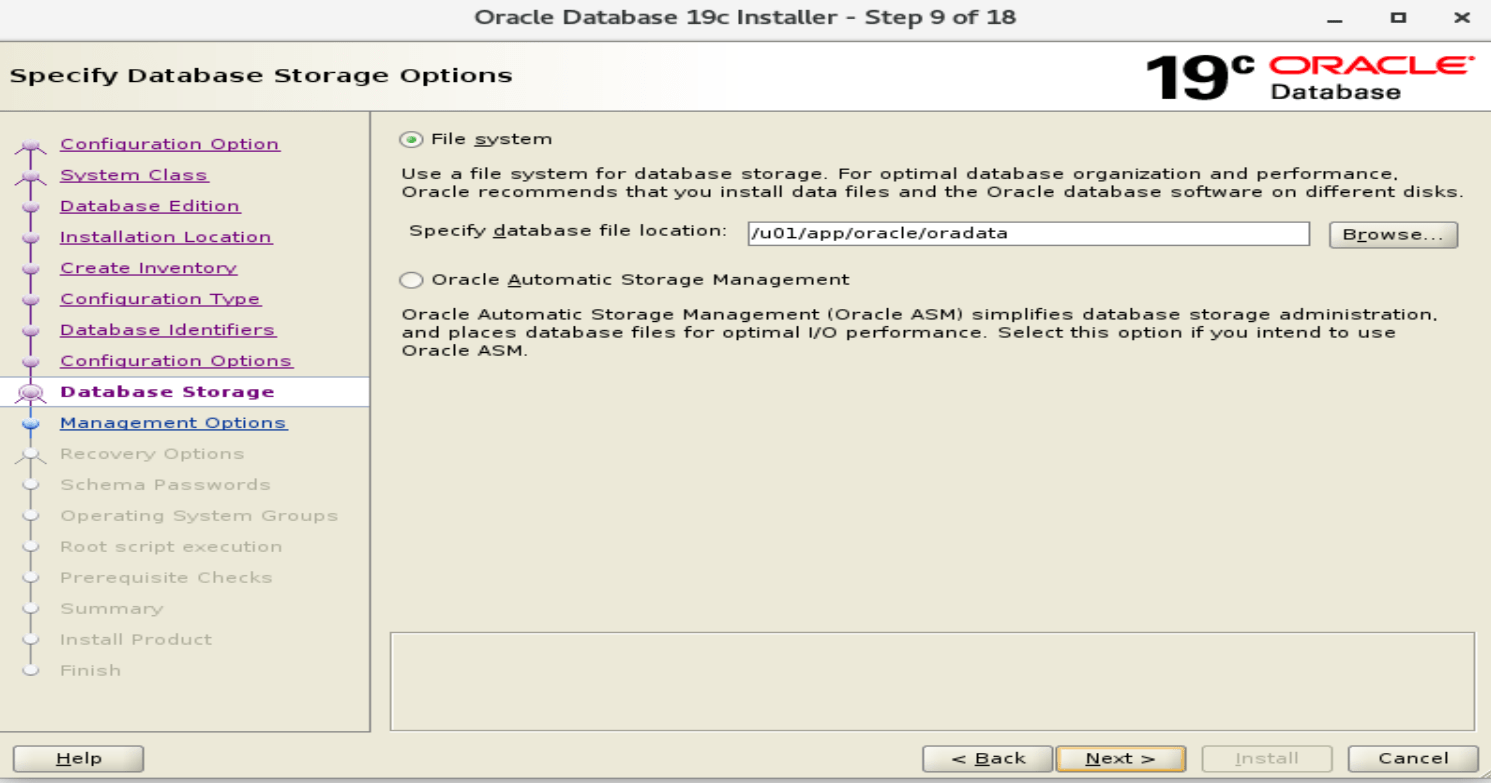
22. Choose the database storage options
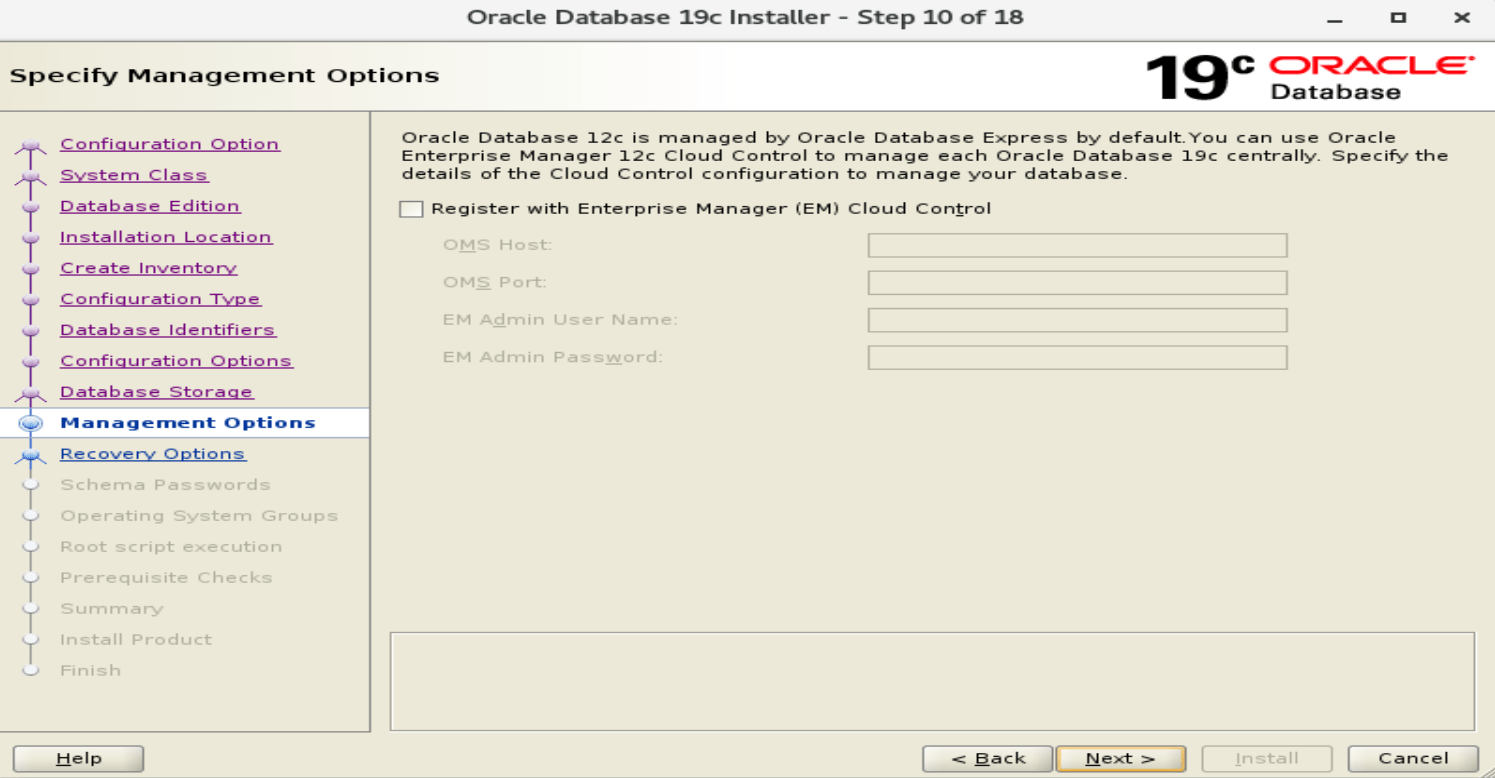
23. Specify Management options means you want to configure or register in Enterprise Manager.
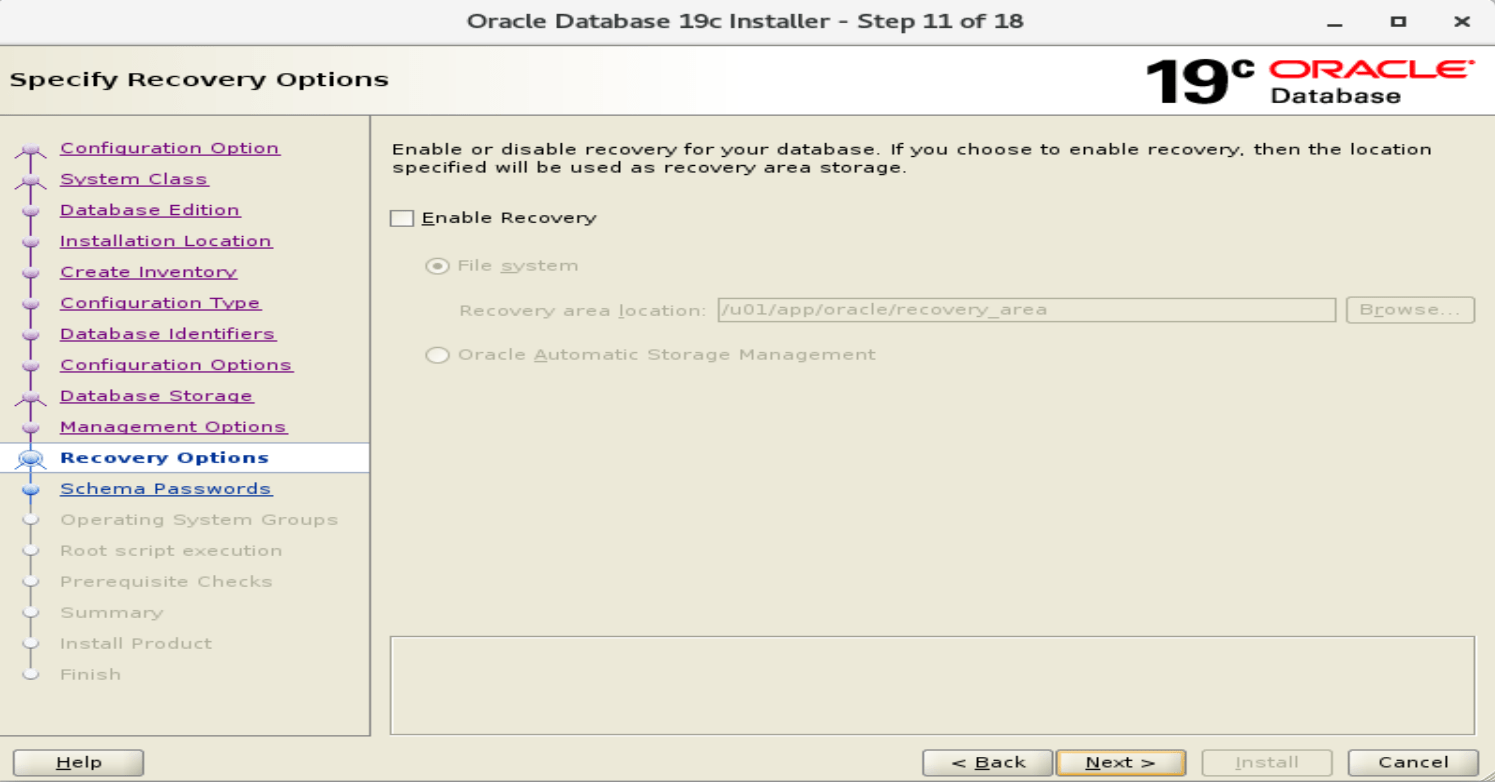
24. Specify Recovery option.
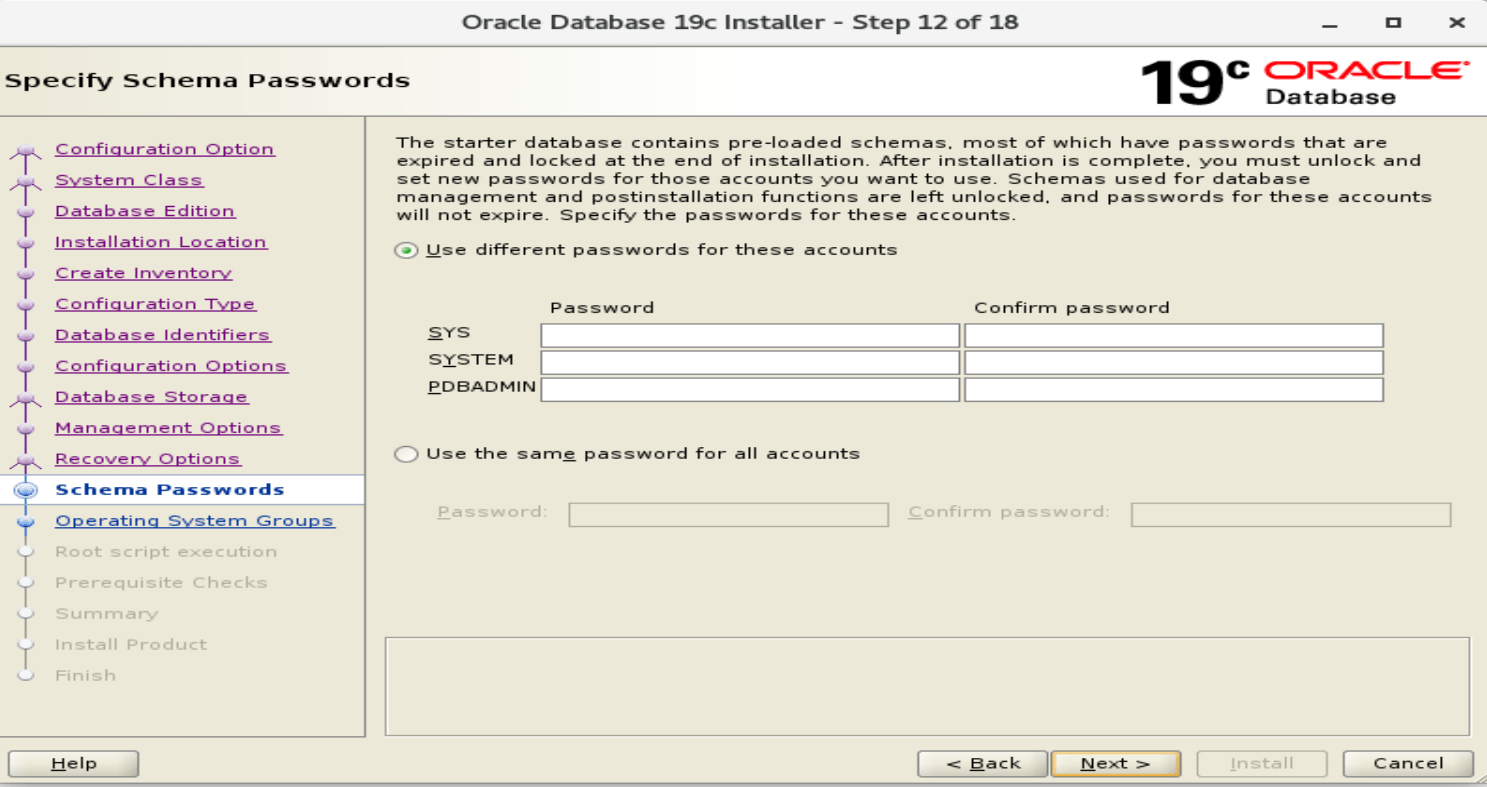
25. Set the superuser password for the Oracle database.
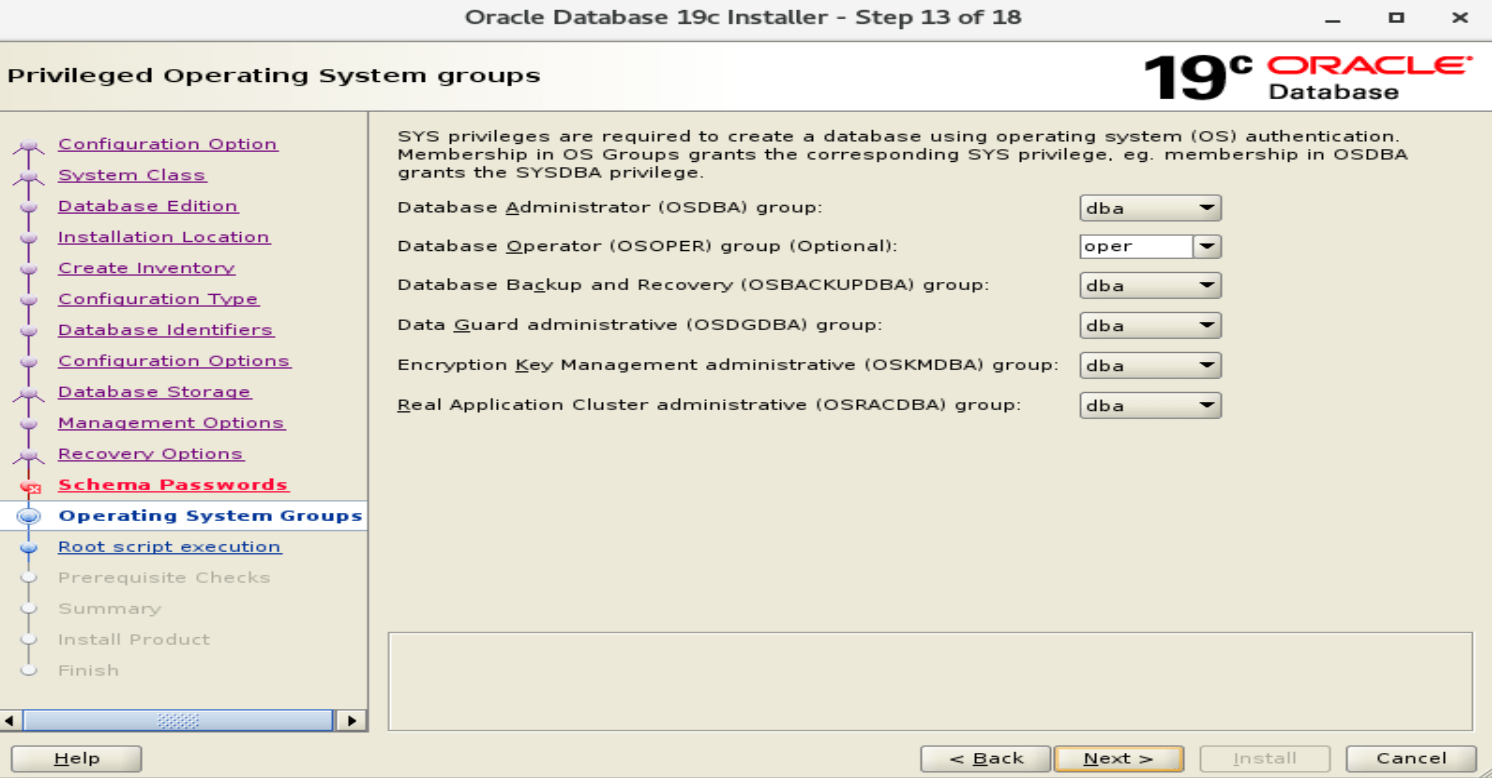
26. Define the groups of operation system.
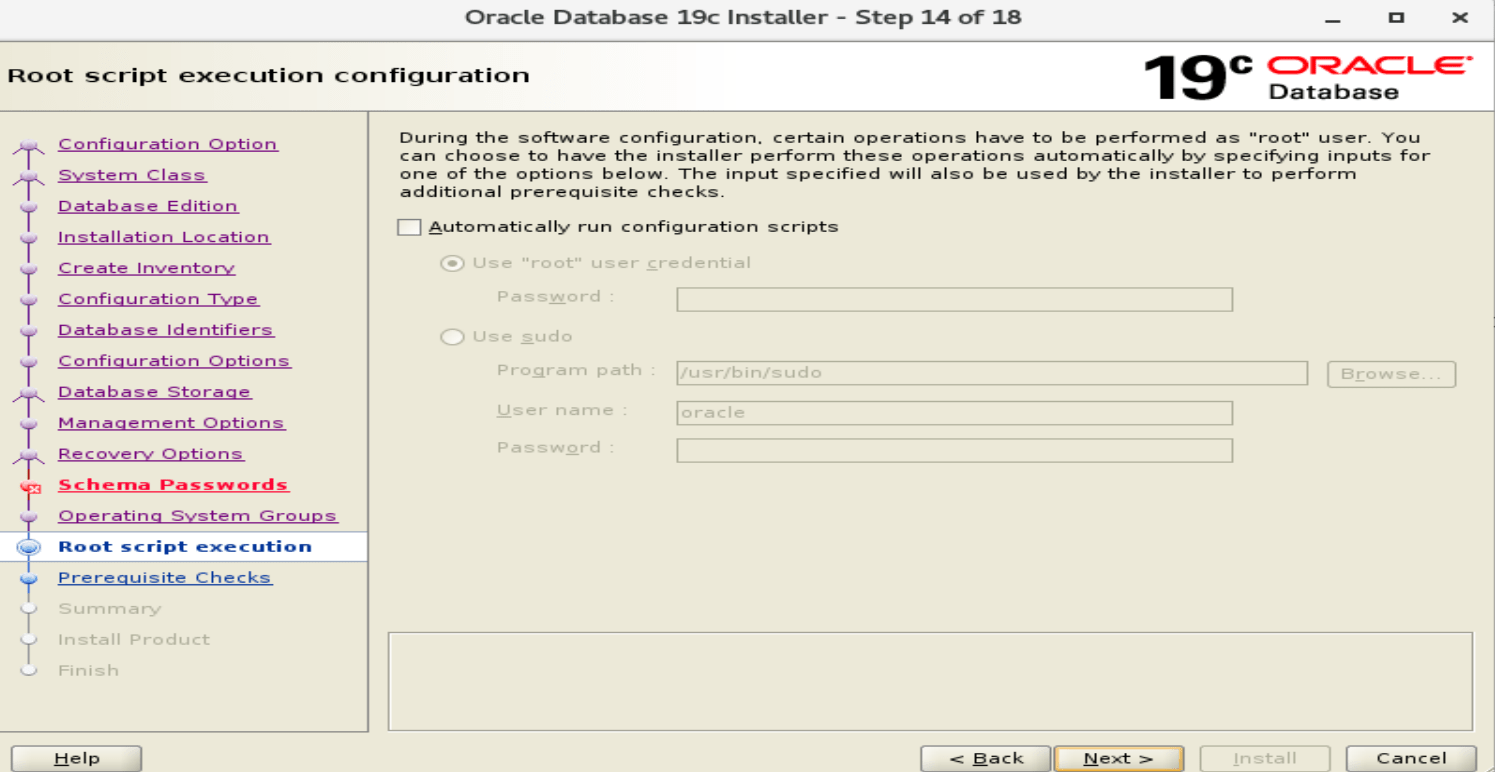
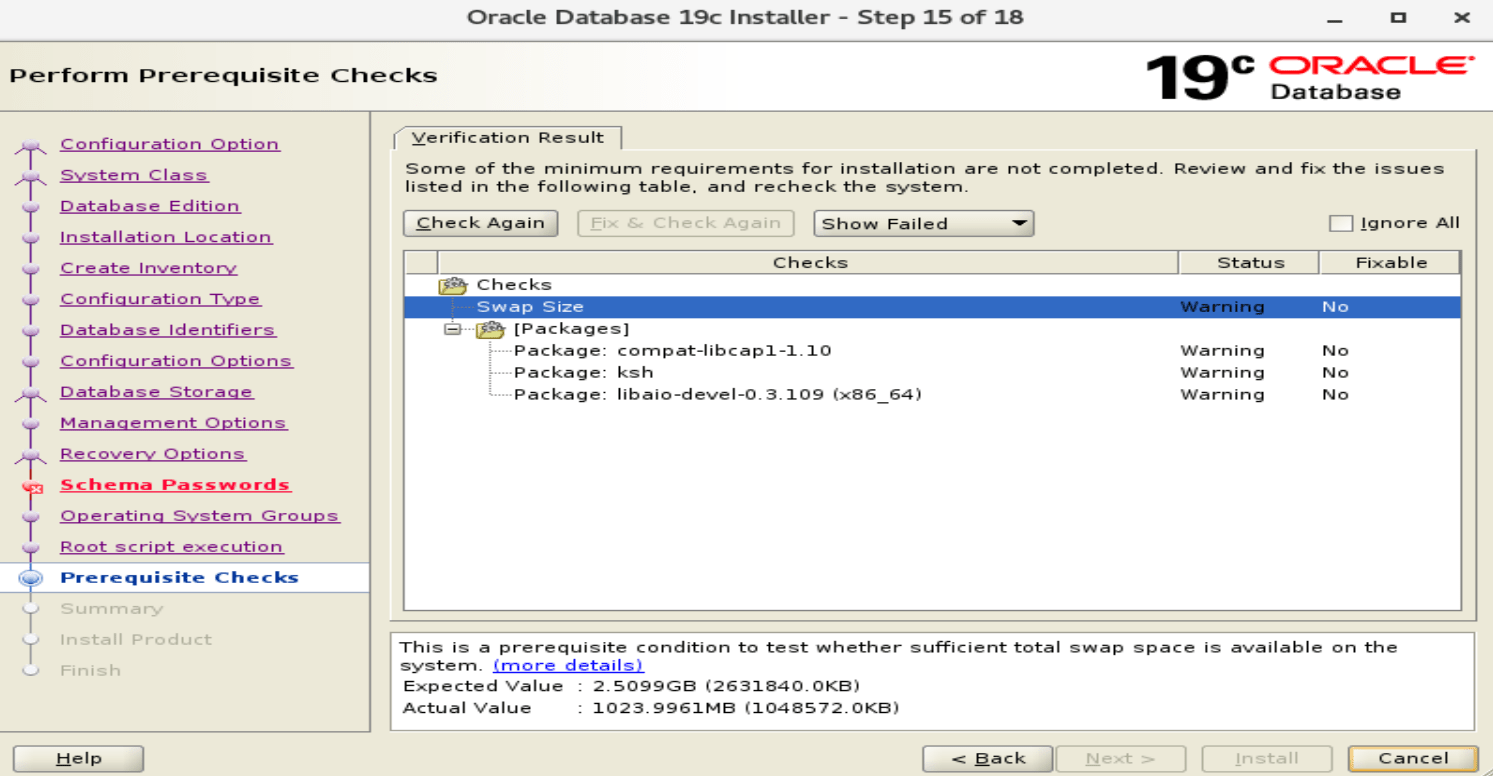
27. Root script execution configuration.
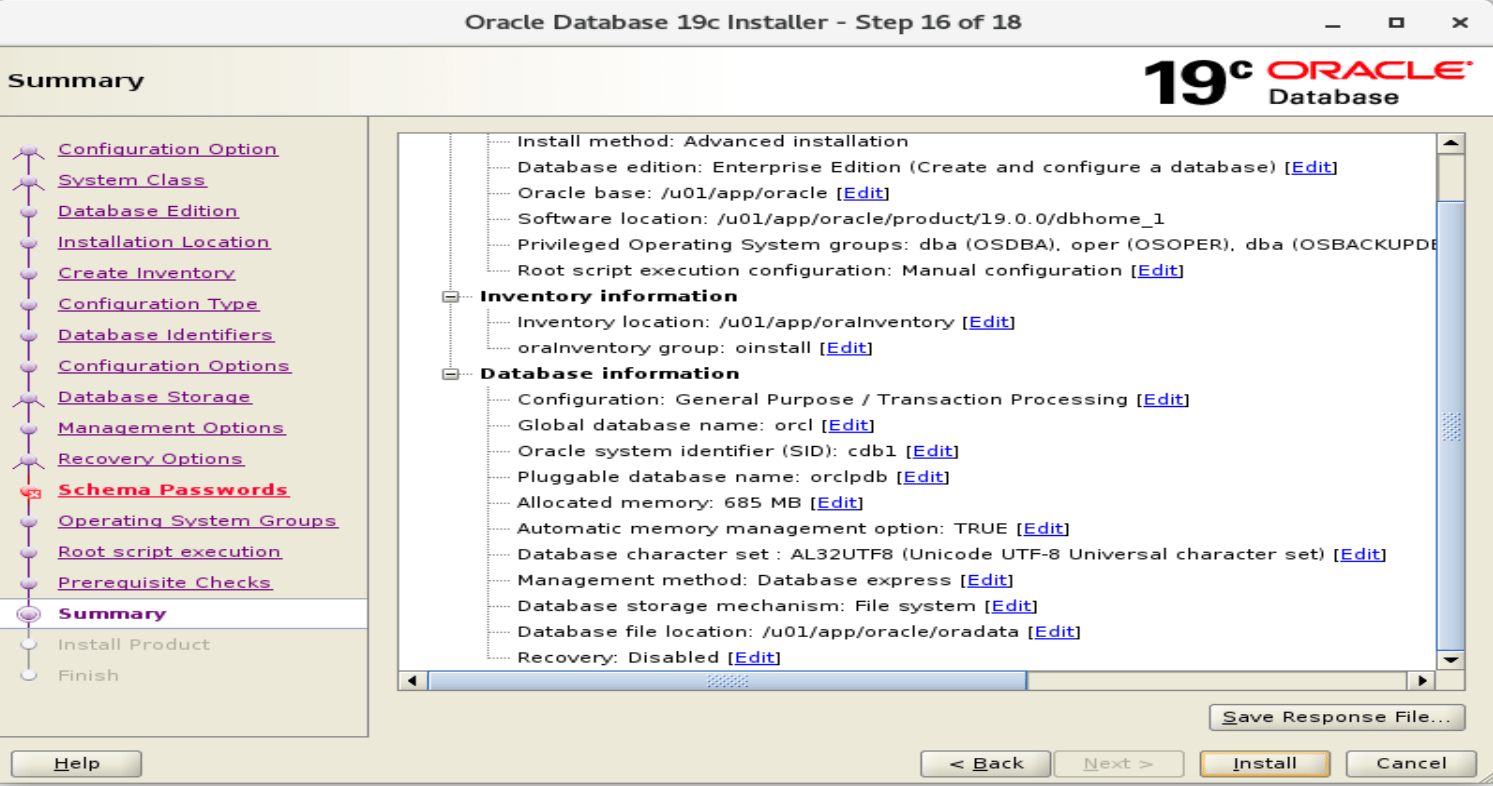
28. Summary
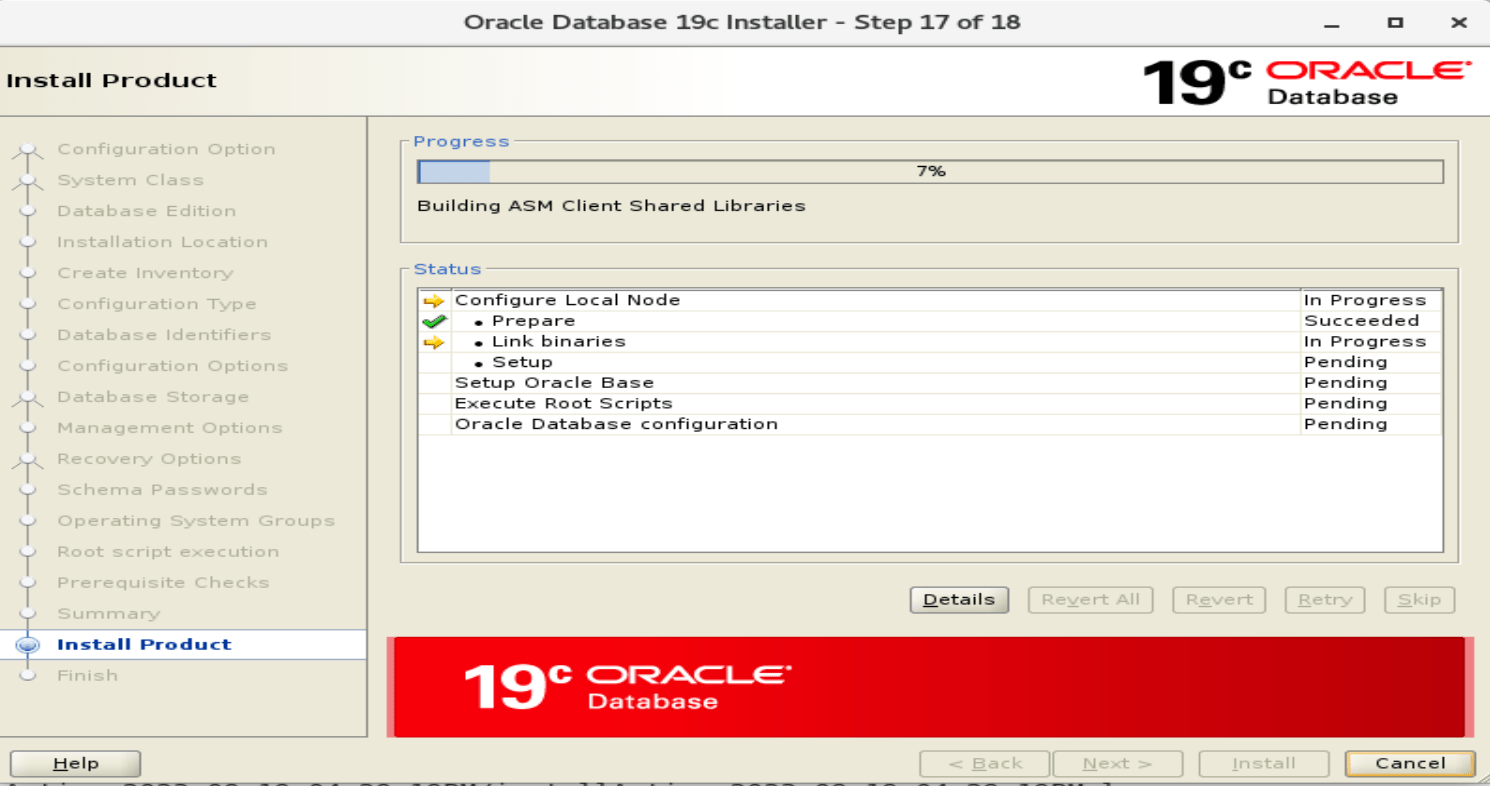
29. Installation started
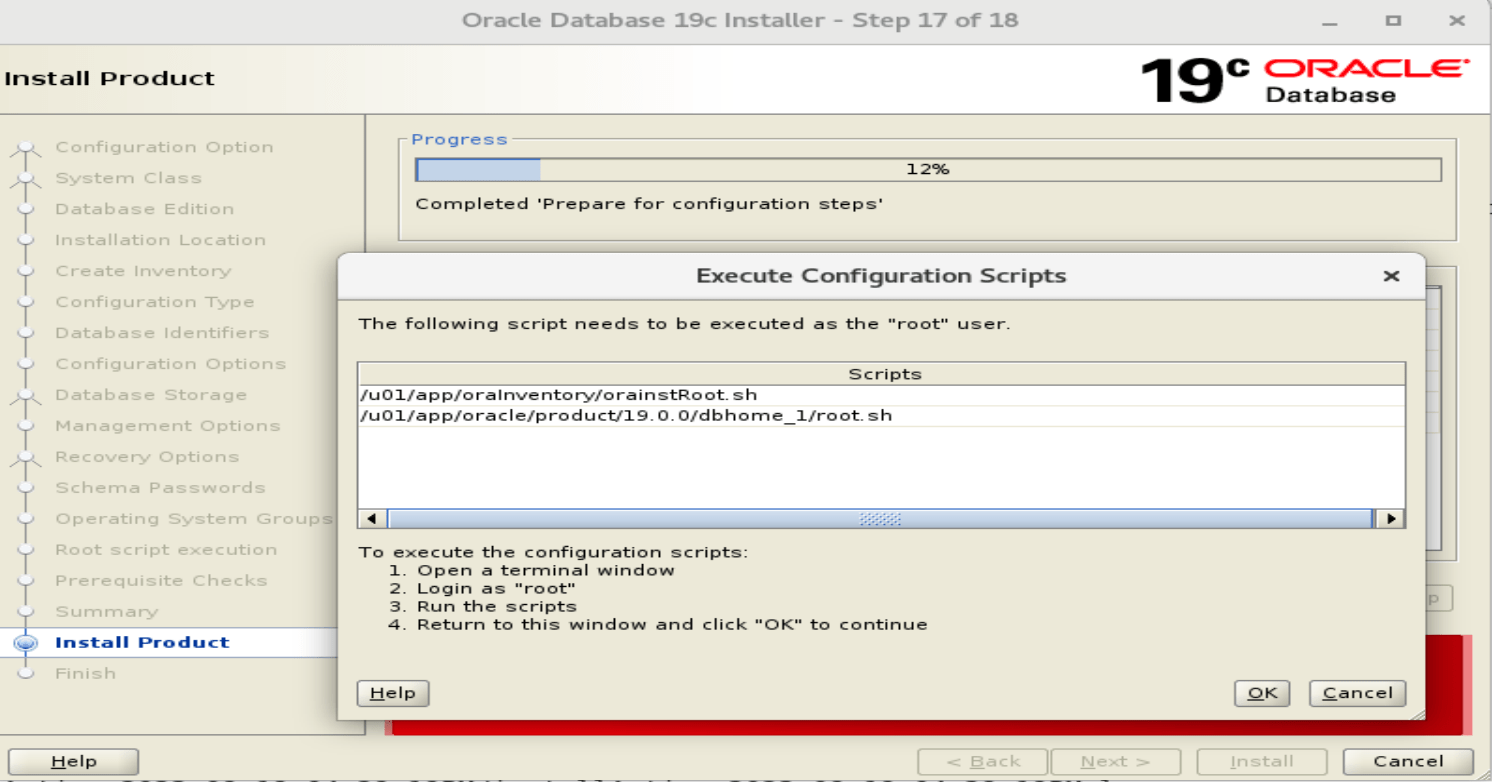
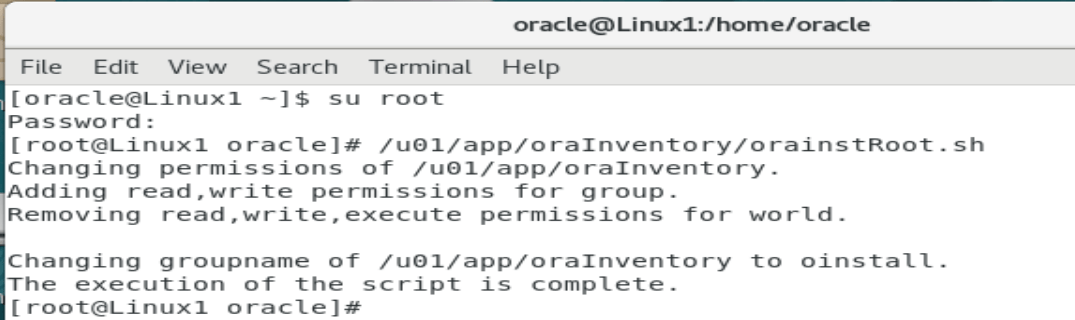
30. Execute the following script from root user. Open new terminal and execute them.
31. Executed the first script
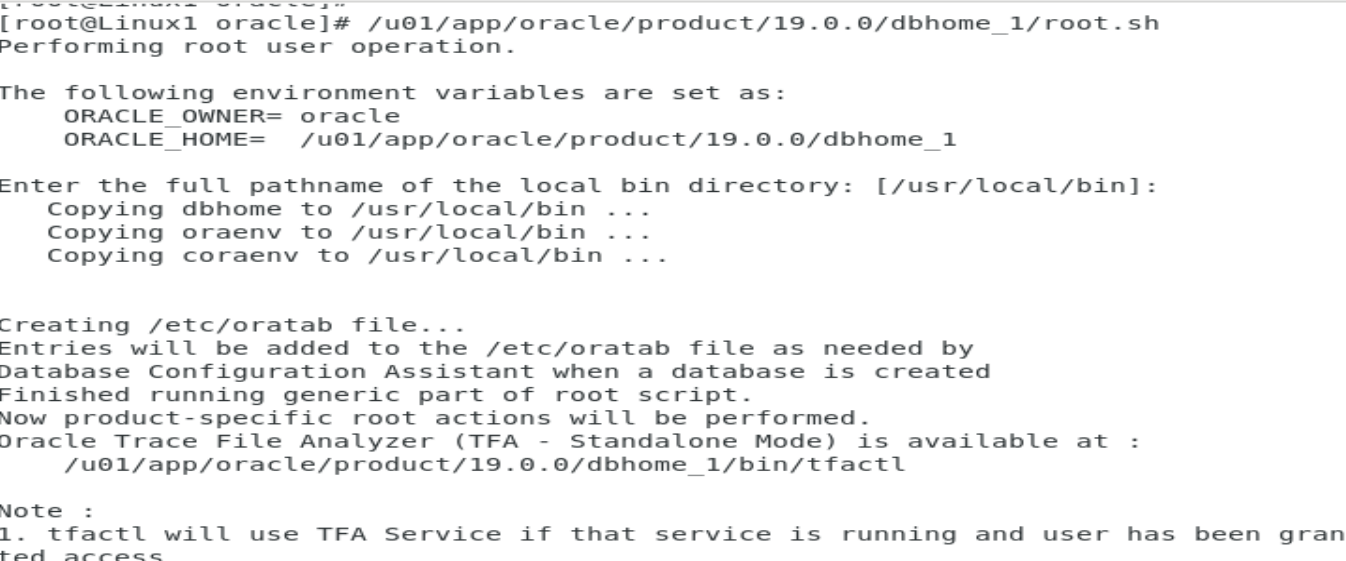
32. Executed the second script
33. Then press Ok you installation will go on completed in GUI.